
A record cleaning machine has always been on my wantlist, but (like many) because of the price and lack of surface space for a dedicated unit I put it off. Ok, it may have also been because I was buying records instead. Now that I am trying to record my records digitally, having clean records is paramount. With the Record Doctor VI, I feel I was able to get the best sound out of my records possible at an affordable price. Cleaner records = better recordings.
More DJ / Stereo equipment reviews:
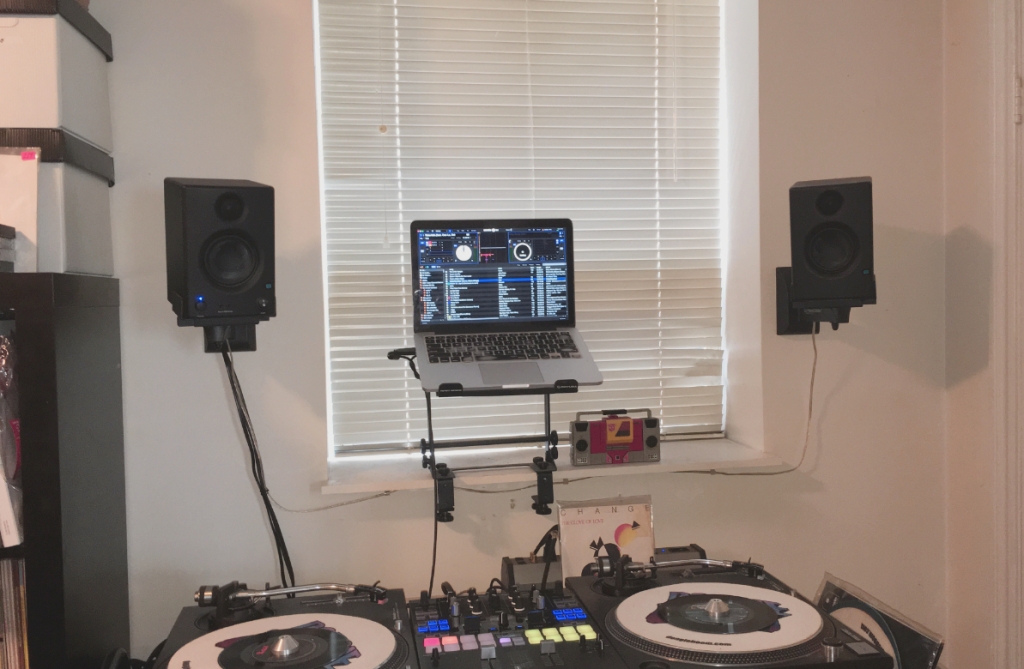
• PRESONUS ERIS E3.5 SPEAKERS FOR A HOME DJ SET UP (REVIEW)
• REVIEW: QSC CP8 SPEAKER – A DJ’S LIL BEST BUD?
• REVIEW: IS THE SONY PS-HX500 THE USB RIPPING TURNTABLE WE HAVE BEEN WAITING FOR?

Personally, I have been in the process of ripping my records to digital copies for listening and DJing. During the process I have purchased a turntable specifically for this, changed its needle to something a little more respectable, and have tried various mats with varying degrees of success. However, the crackle created by deeply embedded dust always bothered me. Even records that seemingly looked brand new would have that intro / outro crackle and also intermittently throughout, especially in quite parts. Obviously this is the life you choose if you play records. It is not a CD, mp3, flac or wav file.
So, I did a little research and found that Panagea had recently released an updated version of their Record Doctor series. The previous version Record Doctor V had received a lot of good reviews, but the newest Record Doctor VI boasted notable improvements:
- New sturdier aluminum chasis that is easier to clean.
- New mold-injected turning knob, which is bigger than the Doctor V. Easier to grip and covers the whole label, protecting it from solution.
- New fan and venting to keep it quieter and cooler during operation (now also on the V)
However, in Canada it was not so readily available during the summer, probably due to Covid. However, it has finally become available in Canada again, after a hiccup in production and distribution. Finally, I received the new Record Doctor VI, purchased at PC Audio from London, Ontario for $439.95 CAD.
Manual Cleaning on The Record Doctor IV “First Hand”

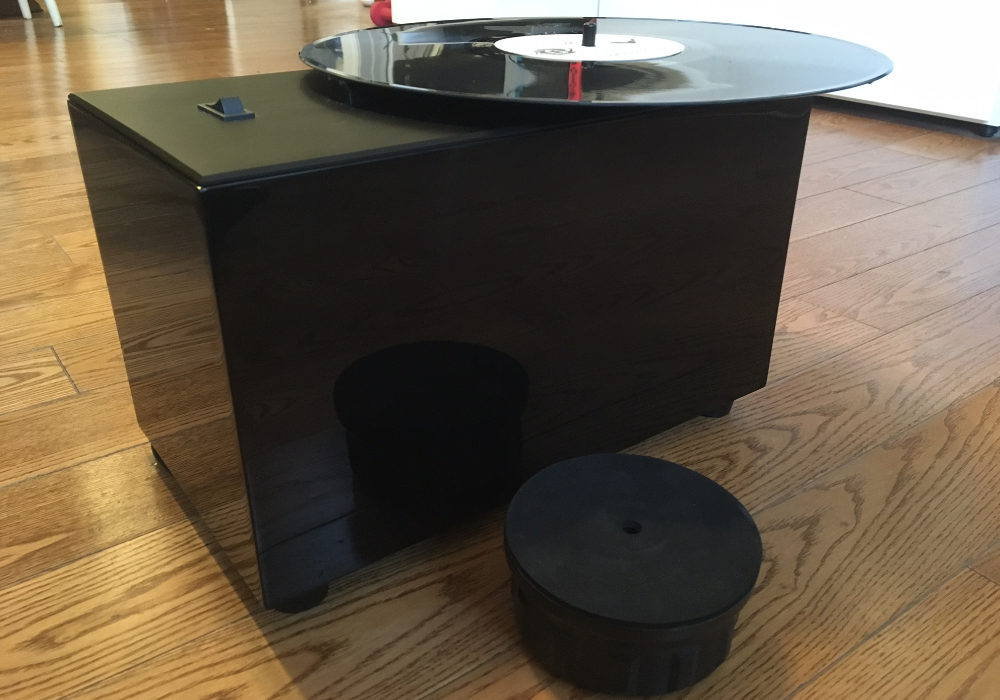
My first impressions were good! There are two different versions, the ‘Carbon Fibre’ and the ‘Gloss Black’ (which I chose) has a sleek look, that would be easy to clean (with solution mishaps) and dust. The sides are a glossy black but the top is a black brushed aluminum (nice texture). It has good solid weight to it and was a good size.
All-vinyl mixes by Dougie Boom:
• NEW JACK SCHWWWWWING (A NEW JACK SWING 45 MIX)
• THE BEST OF WAX TRAX! ON WAX – A LABEL TRIBUTE MIX
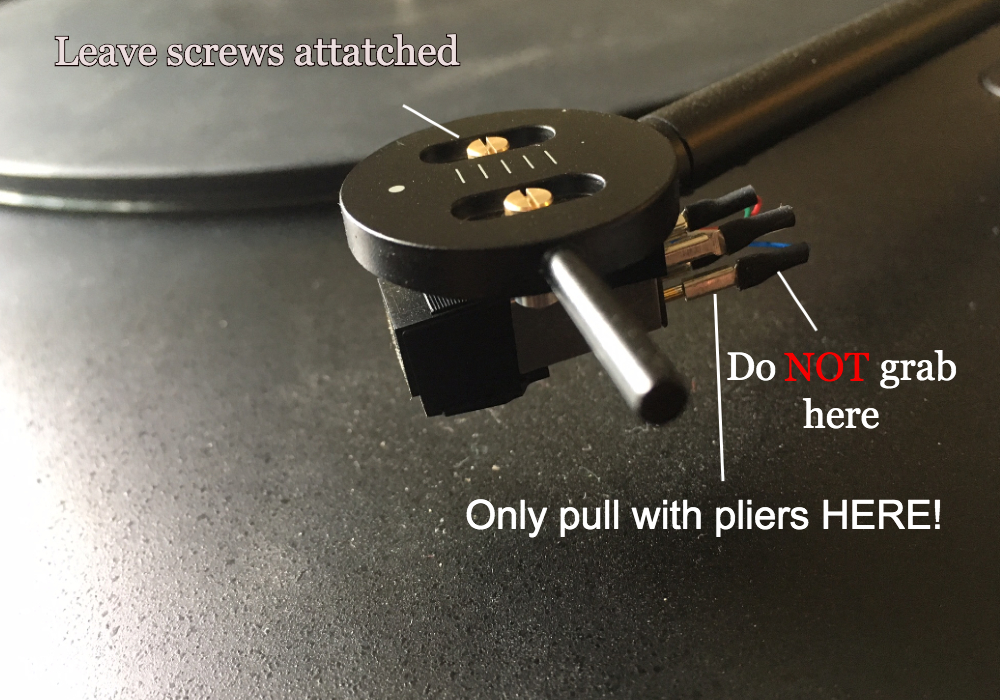
Now, first hand, the process of manually cleaning records on the Doctor VI, is not that tasking in the slightest. You simply take your LP or 45 record, place it on the machine on the spindle (at first, the side up that you want to clean), put on the turning clasp. You put a couple of drops of cleaning solution on the record surface. Then, using your application brush you spread the solution on your record (running circular in the direction of the groove). You may be tempted to spin the record and hold the brush but Record Doctor warns not to spin records without solution. So, taking in consideration for the bottom side of the record, that is close to the vacuum strip, instead I do a 12-6 o’clock spreading of the solution followed by a light rotation of the record and another 12 to 6 to spread the solution to the other side. Being careful not to add too much solution, but maybe more for dirtier records.

The Record Doctor V includes Panagea’s own Record Doctor Clean Sweep Brush to apply the solution. I have always been weary of these types of micro fiber brushes, preferring the 70s-style velvet brushes. However, the Clean Sweep Brush with its 260,000 ultra-fine nylon bristles when used in conjunction with the solution feels more more like a squeegee, smoothly going over the surface of records and gets all that gunk in the grooves. Very effective and feels smooth.

Then, after the solution is applied, you flip over record, apply the clamp and turn on the vacuum. Next, you rotate the record, turning the clamp, as the vacuum strip sucks the solution off the record and takes all the dirt and grime with it. The speed and direction at which you turn the record is essentially up to you. That is the good thing about manual record cleaners. You can focus on problem areas of records or areas that have a lot of solution. Also, you can go either direction clockwise or counter clockwise, back and forth at will. The vacuuming process shouldn’t take much longer than 30 seconds or so. Remove and inspect the record and if it still looks saturated, repeat on problem areas.

Although their quick manual does not include the extra step, I give the record a rinse after with some distilled water and then use the Record Doctor again to dry the record.
The REAL dirt on The Record Doctor IV (Verdict)
If you have always wanted a cleaning vacuum machine for your records but haven’t because of price, Panagea’s Record Doctor VI may be for you. Because of its price point and functionality it is definitely your entry level cleaner, however I couldn’t see how it can get much better than this. It sucks and that’s a good thing. Sure, automatic record cleaners offer there own conveniences but ones that change the direction of rotation are more expensive. This you can manipulate the record to your heart’s content, much like the Nitty Gritty Record Cleaner but $400-$1200 cheaper.
I was really blown away by how clean the results were. Better than any other cleaning record method or solution than I have ever tried. You could see the individual grooves of the records come to life and appear more defined just by visually inspecting the record. Of course the records sounded better. It is hard to quantify but I would say dirty records were improved 15-25% and records I thought were clean were 10-15% better.
As far as the unit itself, the Record Doctor VI aesthetically looks good, takes up very little space and can be easily placed aside and brought out when needed. It was easy to operate. Panagea boasts since the Doctor V, they have improved the loudness of the vacuum and overheating with the inclusion of a new vent and fan (located at the bottom). This may be so but it is still pretty loud and can get pretty hot. This wasn’t so much of a problem as it changed my workflow of how I cleaned my records. I would clean one side using the Doctor, rinse with distilled water, vacuum the water off, then let the record air dry for a bit. After about 10 records I would stop, as the unit seemed hot to the touch and ready for a cool down. I would then record the newly cleaned records and do the reverse and
One thing that is odd is that I haven’t had to empty it of any liquid from the Record Doctor. It has a plug at the bottom which you remove to let the vacuumed solution and water drain, which they recommend after 20 -25 records. I have done at least a 100. I don’t know whether it is the dry Ontario fall/winter climate or the heat from the machine itself but there is never any access solution / water to empty. hmmmm?
Although, there is included solution you may want to get more solution (if you don’t have any). Panagea also offers concentrated solution, you simply add water to (distilled water over regular tap is probably a good idea). Also, the Record Doctor VI does not come with a cover, which is sold separately. If you have the skills you could probably even sew one with pockets yourself.
I’M A Doctor, Jim, Not A MAGICIAN…
As magical as result can be on the Record Doctor VI (it should be clear) it cannot completely alter what has already been done regarding the condition of your record. That is to say, don’t expect the Doctor to remove deep scratches. As far as I know there is no technique to repair a record. What you will get is the cleanest possible record with the dust and dirt removed. So, set realistic expectations, if your record is trashed you may just have to buy a new copy. And that copy the Doctor will keep as clean as possible for a long time.
REcord Doctor VI – Pros
- More affordable manual vacuum record cleaner.
- Sleek look that looks good and feels solid.
- Comes with brush for application and a small amount of cleaning fluid.
RECORD DOCTOR VI – Cons
- Despite the newly added vent, it is still pretty loud and hot, so you should moderate use. Think 70s vacuum more than hair dryer loud.


 Recently, I had a Discogs user contact me that he was unable to send me messages to my Discogs store. He would get a red warning: “User ____ has their contact form disabled.” It is an easy fix (for the recipient), but is not worded as such and difficult to find on the internet. To enable your contact form on Discogs (the recipient must):


